Transforming Functionality and Style: A Comprehensive Guide to DIY IKEA Makeup Vanities
Related Articles: Transforming Functionality and Style: A Comprehensive Guide to DIY IKEA Makeup Vanities
Introduction
With enthusiasm, let’s navigate through the intriguing topic related to Transforming Functionality and Style: A Comprehensive Guide to DIY IKEA Makeup Vanities. Let’s weave interesting information and offer fresh perspectives to the readers.
Table of Content
Transforming Functionality and Style: A Comprehensive Guide to DIY IKEA Makeup Vanities

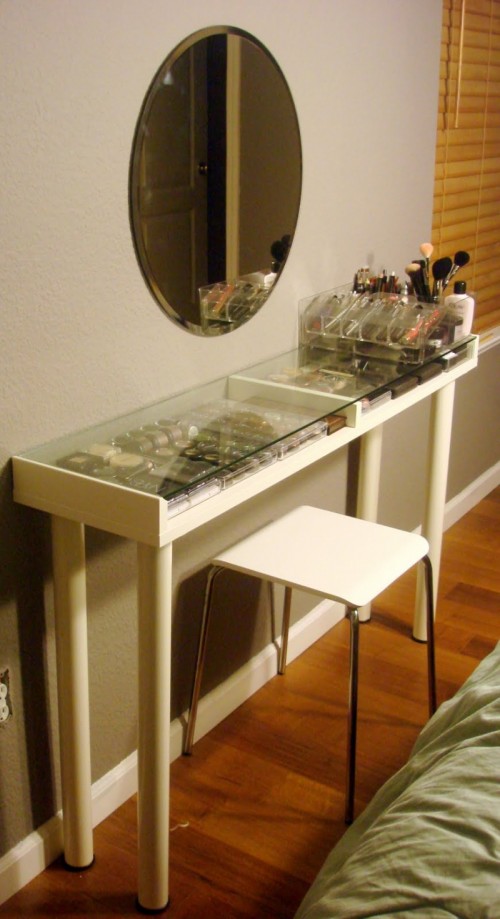
The pursuit of a dedicated space for personal grooming and beauty rituals has led many to seek solutions that balance functionality and aesthetics. While pre-built vanities offer convenience, the desire for personalized design and cost-effective solutions often drives individuals to explore DIY options. IKEA, with its readily available furniture and affordable prices, presents an ideal platform for crafting a unique makeup vanity.
This comprehensive guide delves into the intricacies of DIY IKEA makeup vanities, exploring the various approaches, materials, and customization techniques that can be employed to create a functional and visually appealing workspace.
Understanding the Appeal of IKEA Makeup Vanities
The allure of IKEA makeup vanities stems from several key factors:
- Affordability: IKEA furniture is known for its budget-friendly pricing, making it an attractive option for those looking to create a vanity without breaking the bank.
- Versatility: IKEA’s wide range of furniture styles and sizes provides a diverse selection for individuals to choose from, ensuring a suitable fit for any space and aesthetic preference.
- Customization Potential: IKEA furniture often features simple designs that can be easily modified and customized to suit individual needs and preferences.
- Durability: IKEA furniture is generally known for its durability and longevity, making it a reliable foundation for a DIY vanity project.
DIY IKEA Makeup Vanity: A Step-by-Step Guide
Creating a DIY IKEA makeup vanity involves a series of steps, each requiring careful planning and execution:
1. Selecting the Foundation:
-
Choosing the Right IKEA Furniture: The first step involves selecting the base furniture for the vanity. Popular choices include:
- Dressers: Dressers offer ample drawer storage for makeup, brushes, and other beauty essentials.
- Side Tables: Smaller side tables can be used for a more compact vanity setup.
- Shelving Units: Open shelving units provide easy access to products and a more minimalist aesthetic.
- Considering Size and Dimensions: Carefully consider the size and dimensions of the chosen furniture to ensure it fits comfortably within the designated space.
- Assessing Storage Needs: Determine the amount of storage required for makeup, tools, and other beauty supplies.
2. Adding a Mirror:
- Mirror Selection: Choose a mirror that complements the chosen furniture style and provides sufficient size and magnification for makeup application.
- Mirror Placement: Consider the best placement for the mirror, ensuring a clear view of the face and optimal lighting conditions.
- Secure Mounting: Securely mount the mirror to the furniture using appropriate mounting hardware.
3. Incorporating Lighting:
- Lighting Importance: Adequate lighting is crucial for accurate makeup application.
-
Lighting Options: Explore various lighting options:
- Vanity Lights: Dedicated vanity lights offer focused illumination.
- LED Strip Lights: LED strip lights can be easily installed around the mirror for a modern and customizable look.
- Natural Light: Maximize natural light by positioning the vanity near a window.
- Light Placement: Position the lights to avoid casting shadows on the face and ensure even illumination.
4. Enhancing Functionality:
- Adding a Makeup Organizer: Utilize makeup organizers to create a structured and organized storage system within the vanity.
- Installing Drawers: Consider adding drawers to a dresser-style vanity to maximize storage space.
- Utilizing Trays and Baskets: Trays and baskets can be used to separate and organize items within drawers or on open shelves.
5. Personalizing the Vanity:
- Paint and Wallpaper: Transform the look of the vanity with a fresh coat of paint or wallpaper to match your personal style.
- Decorative Elements: Add decorative elements like knobs, handles, and accent pieces to enhance the vanity’s aesthetic appeal.
- Customizing the Mirror: Consider framing the mirror or adding decorative elements to personalize its appearance.
6. Final Touches:
- Adding a Comfortable Stool: Provide a comfortable stool or chair for sitting while applying makeup.
- Accessorizing the Vanity: Accessorize the vanity with decorative trays, jars, and other items to create a stylish and functional workspace.
FAQs about DIY IKEA Makeup Vanities
Q: What tools are needed for a DIY IKEA makeup vanity project?
A: The tools required will vary depending on the chosen furniture and customization techniques. Generally, basic tools such as a screwdriver, drill, measuring tape, and level are essential. Additional tools may be needed for specific modifications, such as cutting tools for adding shelves or a saw for customizing furniture dimensions.
Q: How can I ensure the chosen IKEA furniture is sturdy enough for a vanity?
A: IKEA furniture is generally designed to be sturdy and durable. However, it’s important to choose a piece that is appropriately sized and constructed for the intended purpose. For heavier items, consider reinforcing the chosen furniture with additional support structures, such as adding brackets or braces.
Q: What are some tips for creating a well-lit vanity?
A: A well-lit vanity is essential for accurate makeup application. Consider the following tips:
- Natural Light: Position the vanity near a window to maximize natural light during daylight hours.
- Artificial Light: Utilize a combination of light sources, such as vanity lights and LED strip lights, to create balanced and even illumination.
- Avoid Harsh Shadows: Position lights to avoid casting shadows on the face.
- Color Temperature: Choose light bulbs with a color temperature that complements your skin tone and makeup application.
Q: How can I personalize the vanity to match my style?
A: Personalization is key to creating a vanity that reflects your individual preferences:
- Paint and Wallpaper: Use paint or wallpaper to transform the vanity’s appearance and create a cohesive look with your decor.
- Decorative Elements: Add decorative elements like knobs, handles, and accent pieces to enhance the vanity’s aesthetic appeal.
- Accessorizing: Accessorize the vanity with decorative trays, jars, and other items to create a stylish and functional workspace.
Q: What are some tips for organizing makeup and beauty supplies?
A: Effective organization is essential for a functional vanity:
- Utilize Organizers: Employ makeup organizers to create a structured and organized storage system within the vanity.
- Categorize Items: Group similar items together, such as lipsticks, eyeshadow palettes, and brushes.
- Label Drawers and Shelves: Label drawers and shelves to easily locate specific items.
- Use Trays and Baskets: Trays and baskets can be used to separate and organize items within drawers or on open shelves.
Q: What safety precautions should be taken when working on a DIY IKEA makeup vanity project?
A: Safety is paramount when working on any DIY project:
- Use Appropriate Tools: Utilize the correct tools for each task and ensure they are in good working order.
- Wear Safety Gear: Wear safety glasses and gloves when working with power tools or sharp objects.
- Work in a Well-Ventilated Area: Ensure adequate ventilation when working with paints, adhesives, or other materials that emit fumes.
- Read Instructions Carefully: Thoroughly read and understand all instructions before beginning any task.
- Seek Professional Assistance: If unsure about any aspect of the project, seek professional assistance from a qualified individual.
Conclusion
Transforming an IKEA piece into a personalized makeup vanity offers a unique opportunity to blend functionality with style while staying within budget. By following the steps outlined in this guide, individuals can create a dedicated space that enhances their beauty routine and reflects their personal taste. The combination of IKEA’s affordability, versatility, and the potential for customization empowers individuals to create a vanity that meets their specific needs and elevates their daily beauty rituals.


Closure
Thus, we hope this article has provided valuable insights into Transforming Functionality and Style: A Comprehensive Guide to DIY IKEA Makeup Vanities. We thank you for taking the time to read this article. See you in our next article!